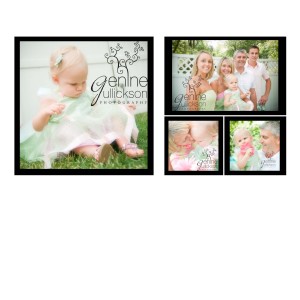

Often I hear clients asking – “How would you group these? – Which would you hang? How Many?” So, I’ve been trying to mock up a quick view with an option or two that I like when sending a client their gallery. Depending on the look you like – symetrical or not; you can easily cluster images from a session to create a stunning wall display! When selecting images, I look for ones with similar coloring or tones – when an image is processed different – say very vibrant or vintage and the others aren’t – it pulls attention not necessarily the way you want it to. So, start by selecting a favorite or a few favorites. Then, see what other images you could group with it as compliments. Generally, I like to have one image be the main focus and therefore largest. Try to alter the sizes – but becareful not to go really big, and then really small. Buying the same style frame keeps the lines the same, and again won’t distract away from the images! Another great idea is to play with the layout on the floor after you’ve placed the images in the frames. Nice not to have holes all over your walls! Last tip – have someone else around when you hang them. It’s always helpful to have a set of eyes viewing the wall straight on and from a bit of a distance. 🙂

